Toolin’ Around: Copying Rubrics in Brightspace

Welcome to another CTLE “Toolin’ Around”!

What are these posts?

They are brief, easy-to-implement tips involving the tools we use every day with students to make our teaching lives, well, easier (and possibly even more effective).

Toolin’ Around Tip:

Rubrics can be used to grade multiple items in Brightspace and can be copied within Brightspace.

Benefits?

    • Use rubrics for more than one graded item
    • Use rubrics in more than one course

You cannot copy a rubric from a live course, so you want to build rubrics in a
shared or personal model. Let’s walk through the steps of building a rubric and then extracting a rubric from both a shared model and a personal model!

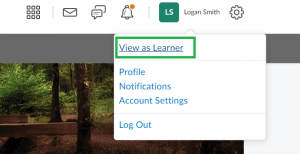
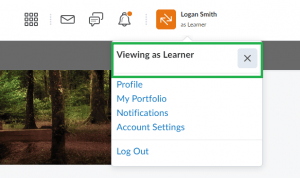
Once you have logged into Brightspace, navigate to the course you want to copy the rubric into.

Navigate through these steps: Course Tools > Course Admin > Import/Export/Copy Components

Copy Components from a Personal or Shared Model

    1. Search for Course offering
    2. Search for and select the course from which you wish to copy the rubric(s)
    3. Select Components
    4. Select ‘Rubrics’
    5. Choose to copy all items or select individual items/rubrics
    6. Select Continue – If you selected individual items, you will now be able to
      select which rubric(s) you wish to copy
    7. Select Continue again
    8. Confirm Components to Copy and offset or update any due dates
    9. Select Finish

For questions, reach out to the Parr CTLE by email – CTLE@cpcc.edu!


Toolin’ Around: Accessibility of Uploads in Brightspace using Ally

Welcome to another Toolin’ Around Blog Post!

Why Use Ally? 

Ally is designed to help instructors improve the accessibility of their course content and provides accessibility checks for Course and Lesson content in Brightspace. Ally also provides suggestions for improving content and provides alternative accessible formats to enable learners to use the format that best meets their requirements.

View the video below to see the Ally tool in action!

For additional help or issues, please contact:

Toolin’ Around: Student View or Impersonate Student

How do I view my course from the student’s view?

There are two ways to preview Brightspace courses from the student perspective, but they differ between live courses and models. 

Live Course: View as Student

Brightspace allows instructors to view courses from the student view. This is helpful to ensure the course is set up in the appropriate manner and to determine that all content is accessible for students.

Note: Any tool where the view is specific to an individual student will not work with the Student Preview option. Examples are Quizzes and Groups. To see a preview of Quizzes, instructors can choose the preview option in the Quizzes menu and see the quiz as if they were a student. 

  1. First, log into Brightspace and enter the course.
  2. Click on your name at the top, right corner of the screen. Then click View as Student.
    1. Note: Learner view will not work if there is a Release Condition on content based on completion of an EVA quiz. Since a quiz cannot be attempted in Learner view, you will be unable to meet that type of Release Condition requirement.
  3. To exit this view, click on your name again in the top, right corner and click the X to exit the student view.

Personal Model: Impersonate Student

In Personal and Shared Models, Instructors can Impersonate a Student which is different from View as Student. Each Model course is created with a Test Student in the Classlist. The Impersonate option allows you to view the course just as a student would. You can take quizzes, check open dates, populate the grade book to check things out, and so on. 

Note: The option to Impersonate a Student is available to model instructors in either the Personal Models or Shared Models (and sandboxes).

  1. On the navbar, Select Roster and then Classlist.
  2. From the Classlist screen, locate the Student, Test, and the dropdown option next to the Test Student. 
  3. In the dropdown menu, select Impersonate.
  4. Click Yes in the popup that appears. This suspends your current session and logs you in as the Test Student.
    1. Note: Using the impersonate option will suspend your current session and log you in as the test student. It is recommended that you only have Brightspace open in one tab when you attempt to impersonate the Test Student.
  5. When you are done, select the Test Student name in the top right corner of the page and select the X to restore yourself back to your own role.

Additional Support

For additional support, contact the Parr Center for Teaching and Learning Excellence:

How to Check the Accessibility of My Content in Brightspace with the Accessibility Checker

Welcome to another CTLE Toolin’ Around!

What are these posts?

They are brief, easy-to-implement tips involving the tools we use every day with students to make our teaching lives, well, easier (and possibly even more effective).

Using the Brightspace Accessibility Checker!

When preparing and presenting content in your course, it is essential to consider web accessibility. Brightspace has a built-in Accessibility Checker! The Accessibility Checker will inform you of any problems with your content. You should make changes as suggested by the Checker to ensure all students can access your content.

View the video below to see the built-in Brightspace Accessibility Checker in action!

Additionally, you can visit the Improve Your Course With Brightspace Accessibility Checker Brightspace Community page for information on how to fix common accessibility issues in Brightspace! 

For additional help or issues, reach out to the Parr CTLE:

Toolin’ Around: How do I upload my syllabus to Brightspace?

Welcome to another CTLE Toolin’ Around!

Brightspace makes it easy to upload a PDF or Word Document syllabus into your course. Use this guide to get your syllabus online and to your students in just a matter of minutes. 

For information on writing your syllabus, you can view the syllabus template which can be found under resources and tools on the internal CPCC website (login required).  

Uploading Your Syllabus:

We recommend you upload your syllabus to the content area of your Brightspace course. Below are steps to upload your syllabus!

Note: These steps assume that you have uploaded the RCE pack into your course.

Steps:

    1. Enter your course and select Content Tab.
    2. Select “Syllabus and Course Information” on the side menu.
    3. Select “Add Existing.”
    4. Drag/Drop your syllabus from your computer into the designated area in your course. 
      • If you’d like to browse for your syllabus, select Browse, and select “Open.” 
    5. Be sure to move the “visibility” toggle at the top left from “Hidden” to “Visible” so that students can view your syllabus. 

View the video below to see the steps in action!